Fashion and Technology
|
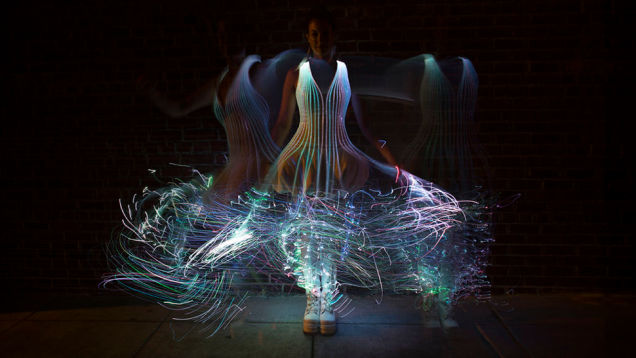
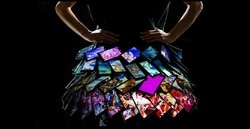
Our FocusDo you like designing clothing, costumes, jewelry or accessories? Would you like to explore creating fashion with high tech elements? In this class we will connect fiber arts like sewing with microcontrollers, LEDs, programmable circuits and 3d printed and laser cut elements to make marvelous wearables.
|
|
MoodBoards for InspirationWhat is a mood board? A mood board is typically a combination of images, fonts, colors, and textures that define the style of the project or the designer. It is a tool for sharing and planning fashion projects that fit an individuals design interests.
The slide show on the right gives examples of some mood boards. Using Paint, create a moodboard which expresses your interest in fashion. You will be using copy and paste extensively to add things to your board. Search Google images for things that express your fashion interests/aspirations or just your design style. Include words, patterns, clothing items, images that appeal to you-- anything. Your moodboard may turn out to be very cohesive or it may be quite eclectic. Either is fine! Tooling UpOur first step in this class will be learning the abilities and constraints of the various tools we have at our disposal. We will be working through:
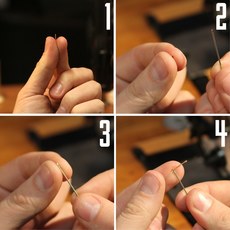
Hand Sewing 101How to thread a needle:
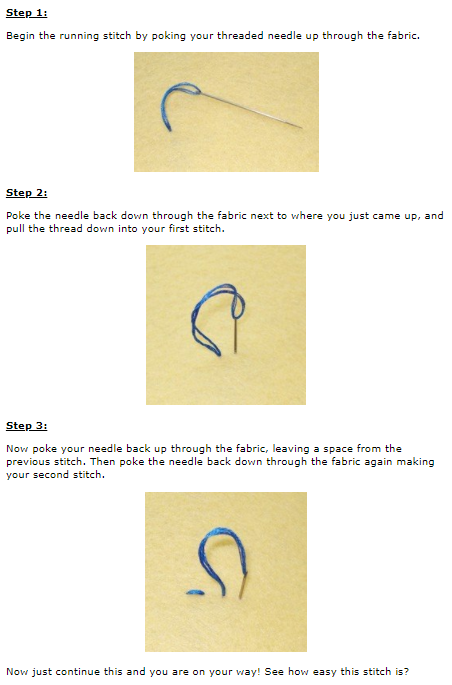
Running Stitch:
|
Backstitch: 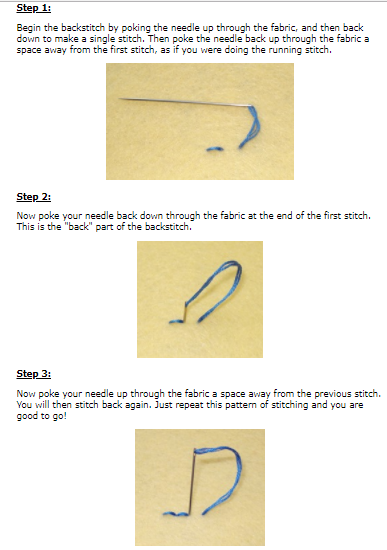
Other embroidery stitches that you can use:
Embroidery Stitch Guide Helpful Stitch Instructions More Advanced Techniques 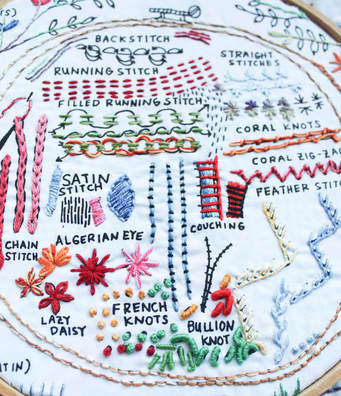
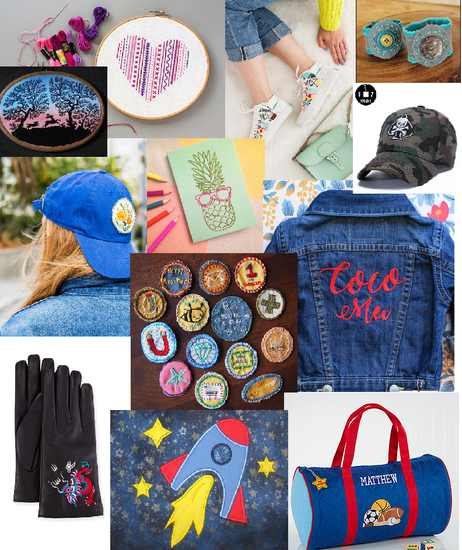
Sewing Project Ideas |
|
Embroider an accessory you own:
Make a sampler. Make a bookmark. Embroider a logo for a sports team or company you like. Embroider a doodle. |
Jewelry Basics
|
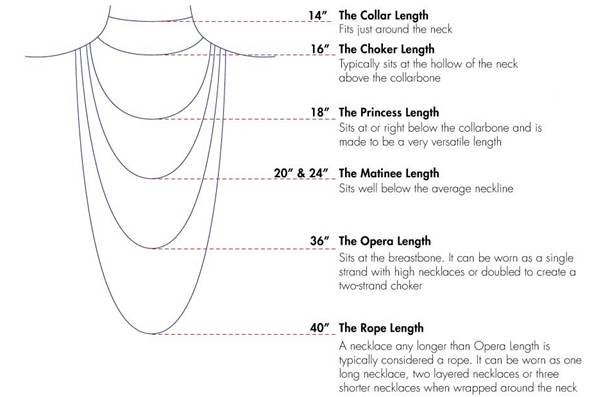
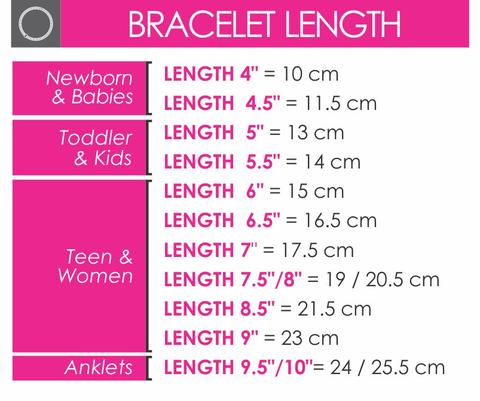
Making Necklaces, Bracelets or Anklets
For chains:
|
|
|
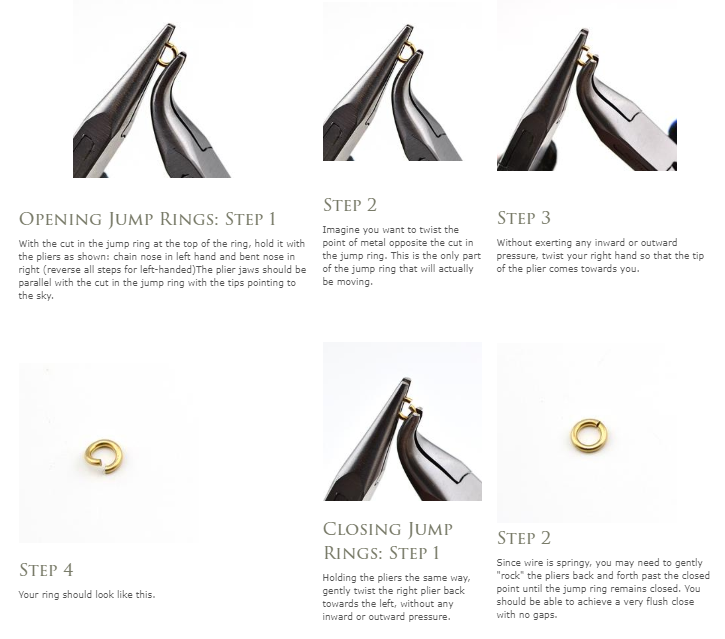
How to Open and Close Jump Rings
You can use two needle nose pliers to do this as well.
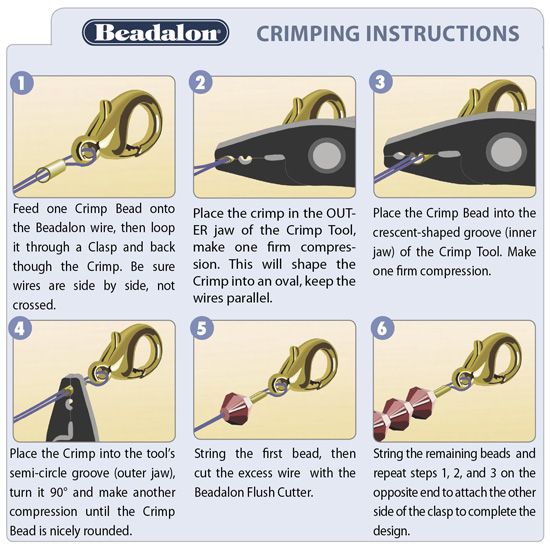
Basic Beading Instructions
|
|
